TCP/IP 프로토콜 알아보기
TCP/IP 프로토콜은 IP 프로토콜 기반에서 데이터 전송 방식을 제어하는 TCP 프로토콜을 함께 호칭하는 용어이며 데이터를 요청하는 클라이언트 프로그램과 데이터를 제공하는 서버 프로그램으로 구성된다.
서버 프로그램은 클라이언트의 데이터 요청이 있는지 알기 위해 특정 포트를 감시하는데 이를 리슨(listen)이라고 하며 감시되는 포트는 다른 TCP/IP 서버는 이 포트에 접근할 수 없다.
TCP/IP 연결이 되면 클라이언트와 서버 모두 소켓(socket)이라는 토큰을 얻고 이 소켓을 통해 양방향(bidirectional)으로 데이터를 주고 받는다.
각각의 클라이언트는 중복되지 않는 소켓 번호를 가지므로 한대의 서버에 여러 대의 클라이언트가 각각의 다른 소켓 번호를 통해 서버 프로그램에 다수로 접근할 수 있다.
HTTP 프로토콜은 TCP/IP 프로토콜 위에서 동작하는 앱 수준 프로토콜이라고 한다. HTTP서버(웹 서버)는 TCP/IP 프로토콜을 사용하며 항상 웹 브라우저와 같은 클라이언트 요청에 응답할 수 있게 특정 포트를 리슨하고 있어야 한다.
Node.js 웹 서버 만들기
Node.js는 웹 브라우저의 자바스크립트 엔진 부분만 떼어내 C/C++언어로 HTTP 프로토콜을 구현하여 독립적인 프로그램 형태로 동작하는 웹 서버 기능을 가진 자바스크립트 엔진을 구현한 것이다.
Node.js는 http 패키지를 제공하며 이 패키지는 createServer 함수를 제공해 웹 서버 객체를 만들 수 있다. 그외 createServer선언문, RequestListener 선언문을 확인하자.
// http 패키지 내 craeteServer임포트
import {createServer} from 'http'

// createServer의 타입 선언문 : 선택적 RequestListener타입 콜백함수를 매개변수로 입력 받는다.
function createServer(requestListener?: RequestListener): Server;

// RequestListener 선언문 : IncomingMessage, ServerResponse 타입 매개변수 2개를 입력받는 함수 타입이다.
type RequestListener = (req: IncomingMessage, res: ServerResponse) => void;
http 서버 또한 TCP/IP 서버이므로 listen 메서드를 사용해 4000번 포트를 리슨하는 코드를 추가한다.
import { createServer } from "http";
const hostname = "localhost",
port = 4000;
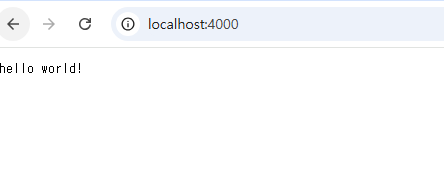
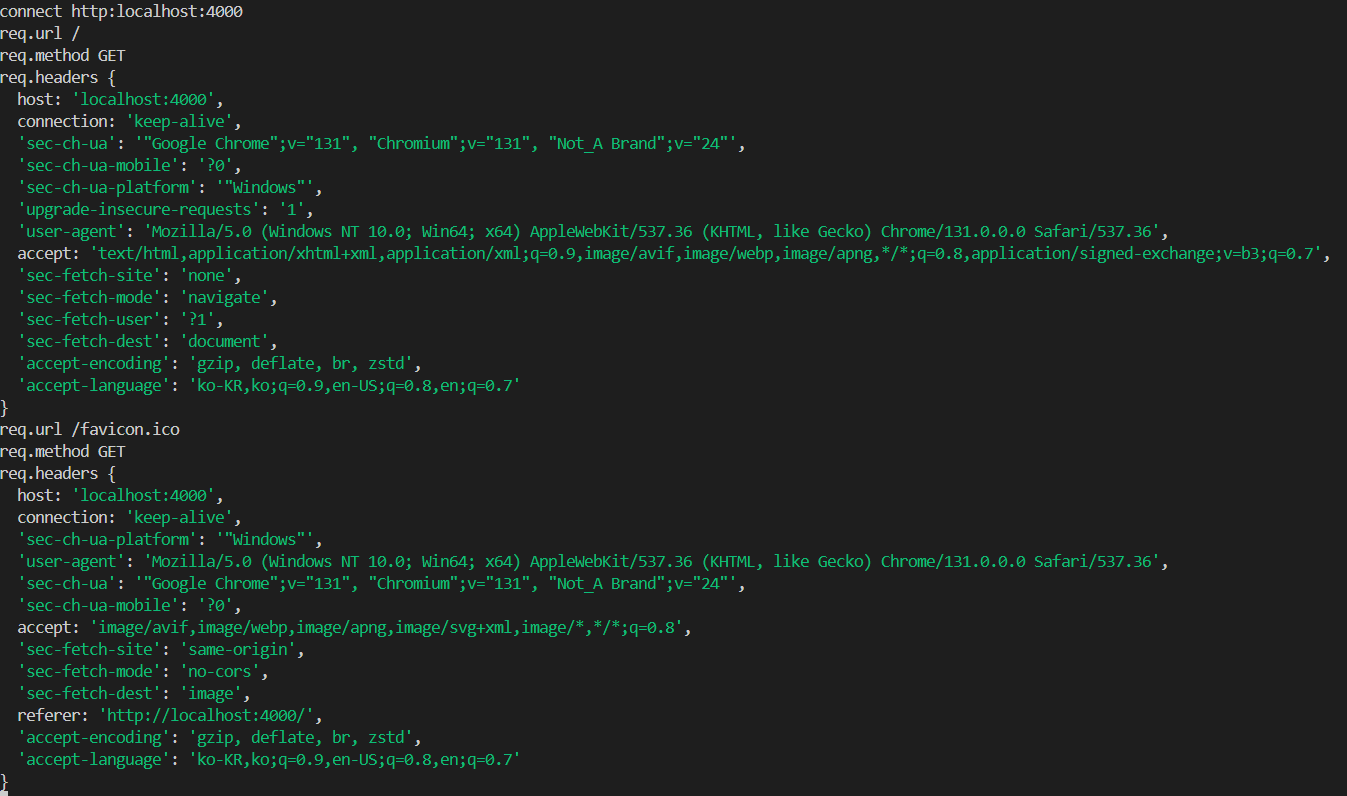
createServer((req, res) => {
console.log("req.url", req.url);
console.log("req.method", req.method);
console.log("req.headers", req.headers);
res.write("hello world!");
res.end();
}).listen(port, () => console.log(`connect http:${hostname}:${port}`));
REST 방식 API 서버
웹 서버는 HTTP 클라이언트에 HTML 형식의 데이터를 전송하는 서버를 웹서버라고 하며, JSON형식 데이터를 전송하는 서버를 API서버라고 한다.
REST(representational state transfer)는 HTTP 프로토콜의 저자 중 로이 필딩(Roy Fielding)의 2000년 박사학위 논문에서 처음 소개 되었으며 req.method 부분에 설정값을 다르게 하여 API서버 쪽에서 DB의 CRUD작업을 쉽게 구분할 수 있다.
| CRUD 작업 | HTTP 메서드 이름 | CRUD 작업 | HTTP 메서드 이름 |
| Create → | POST | Update → | PUT |
| Read → | PUT | Delete → | DELETE |
REST API 기본 원리는 http://localhost:4000/user, http://localhost:4000/list 처럼 경로에 자신이 원하는 자원을 명시하고 이 자원에 새로운 데이터를 생성하고 싶으면 POST, 검색하고 싶으면 GET 메서드를 사용하는 것이다.
이렇듯 REST API는 특정 자원을 항상 일정하게 사용하도록 API를 설계해야 한다.
익스프레스 설치하기
익스프레스 프레임워크(express framework)는 Node.js 환경에서 사실상 표준 웹 프레임워크이다. 익스프레스를 사용하면 웹 서버는 물론 REST 방식 API 서버를 쉽게 만들 수 있다.
익스프레스를 사용하기 위해 express, cors, nodemon 패키지를 설치한다. 이중 nodemon 패키지는 개발의 편의성을 위해 추가로 설치하기 때문에 -D 옵션으로 설치한다. 설치 후 package.json 파일을 일부 수정한다.
{
    ...(생략)...
  "scripts": {
    "start": "nodemon -e ts --exec ts-node src --watch src",
    "start-mac": "nodemon -e ts --exec 'ts-node src' --watch src",
  },
  ...(생략)...
}
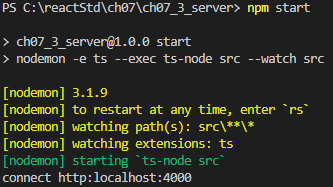
npm start 명령으로 nodemon을 실행한 결과이다.
nodemon은 src 디렉터리의 파일 확장자가 .ts인 파일이 수정되면
프로그램을 자동으로 다시 실행하여 변경된 내용을 즉시 반영해 준다.
(package.json 에 소스를 추가한 이유)
익스프레스 REST API 서버 만들기
익스프레스로 웹 서버를 만들 땐 항상 다음 코드 패턴으로 app 객체를 만들어야 하며 4개의 메서드(GET, POST, PUT, DELETE)를 제공하며, 이 메서드들은 항상 app 객체를 다시 반환한다.
import express from 'express'
const app = express()
app.메서드명(경로, (req,res) => {}) // 메서드 체인방식으로 구현 가능
또한 app 객체의 또다른 특징으로는 createServer의 매개변수인 requestListener로 동작할 수 있는 점이다.
const app = express()
createServer(app).listen(port, () => console.log(`connect http://${hostname}:${port}`))
express 프레임워크를 createServer의 requestListener로 동작시킨 코드를 추가하자.
import { createServer } from "http";
import express, { Request, Response } from "express";

const hostname = "localhost",
  port = 4000;

// prettier-ignore
const app = express().get('/',(req:Request,res: Response) => {
  res.json({message: 'hello express world!'})
})

// createServer의 매개변수인 requestListener로 동작
createServer(app).listen(port, () =>
  console.log(`connect http://${hostname}:${port}`)
);

코드 상에서 res.json 메서드를 통해 json 형식 데이터를 전송했으므로 JSON.stringify 호출을 통해 JSON 데이터를 화면에 표시한다.
익스프레스 관련 코드 분리하기
코드 경량화를 위해 익스프레스 코드를 별도의 파일로 구성하자. 매개변수 args의 타입은 any타입의 배열을 수신하는 형태로 구현했으며 이는 createExpressApp(db), createExpressApp(db1, db2)처럼 createExpressApp를 호출할 때 매개변수를 입력할 수 있게 하는 용도로 쓰인다.
import express, { Request, Response } from "express";

export const createExpressApp = (...args: any[]) => {
  const app = express().get("/", (req: Request, res: Response) => {
    res.json({ message: "Hello express World!" });
  });
  return app;
};
기존의 파일 소스도 수정한다. 현재로는 크게 간소화된 것을 느낄 수없지만 pody, get, put, delete가 많아질 경우 매우 복잡하므로 상당히 용이한 소스 분리 과정이다.
import { createServer } from "http";
import { createExpressApp } from "./express";

const hostname = "localhost",
  port = 4000;

createServer(createExpressApp()).listen(port, () =>
  console.log(`connect http://${hostname}:${port}`)
);
익스프레스 미들웨어와 use 메서드
익스프레스 객체 app는 use 메서드를 제공하며 use 메서드의 매개변수로 사용되는 콜백 함수를 미들웨어(middleware)라고 한다. 즉 익스프레스는 여러 가지 다양한 기능을 미들웨어를 통해 쉽게 사용할 수 있도록 한다.
익스프레스 미들웨어는 매개변수 3개(req, res, next)로 구성된 함수 형태로 구현한다. 여기서 3번째 매개변수인 next는 함수인데 이 함수를 호출해야 app 객체에 설정한 내용이 정상적으로 동작한다.
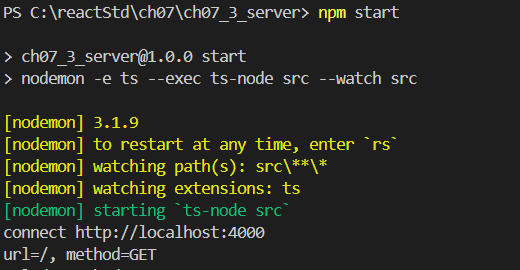
app.use((req, res, next) => {
    console.log(`url='${req.url}, method=${req.method}`)
    next()
})
express 기존 소스에 로깅 미들웨어를 추가해보자.
import express, { Request, Response } from "express";

export const createExpressApp = (...arg: any[]) => {
  const app = express();
  app
    .use((req: Request, res: Response, next: express.NextFunction) => {
      console.log(`url=${req.url}, method=${req.method}`);
    })
    .get("/", (req: Request, res: Response) => {
      res.json({ message: "Hello express World!" });
    });
  return app;
};
express.static 미들웨어
express.static 미들웨어란 이름의 미들웨어를 사용해 익스프레스 객체가 public 디렉터리에 있는 html, css, js, png와 같은 파일을 웹 브라우저에 응답할 수 있게 하는 정적 파일 서버로 동작할 수 있게한다.
import express, { Request, Response } from "express";

export const createExpressApp = (...args: any[]) => {
  const app = express();
  app
    .use((req: Request, res: Response, next: express.NextFunction) => {
      console.log(`url=${req.url}, method=${req.method}`);
      next();
    })
    .use(express.static("public")) // public 디렉토리에 있는 파일 참조
    .get("/", (req: Request, res: Response) => {
      console.log(`url=${req.url}, method=${req.method}`);
      res.json({ message: "Hello express World!" });
    });
  return app;
};
getPublicDirPath 함수 구현하기
방금 전 express.static 미들웨어는 public과 같은 디렉터리를 실제로 생성하지는 않는다. 그러므로 Node.js 환경에서 실제로 디렉터리를 생성하는 함수를 구현할 필요가 있다.
process.cwd함수는 프로젝트 package.json 파일이 있는 디렉터리의 절대 경로를 반환한다. 그리고 path.join 함수는 매개변수에 나열된 모든 경로를 해당 운영체제의 디렉터리 구분 문자(\, /)를 사용해 하나의 문자열로 만들어준다.
import path from "path";

export const getPublicDirPath = () => path.join(process.cwd(), "public");
Node.js는 파일 시스템을 의미하는 fs 패키지를 제공하며 이는 디렉터리와 파일을 다루는 다양한 함수를 제공한다. 이 함수들은 크게 'fs.함수_이름Sync'와 'fs.함수_이름' 2가지 범주로 나뉜다.
Sync 접미사는 동기 함수를 의미하며 작업이 끝날때까지 반환값을 반환하지 않으며 Sync 접미사가 없는 함수는 비동기 함수를 의미하며 함수를 호출하면 결과값을 콜백 함수로 반환한다.
이제 폴더를 추가를 위해 코드를 추가한다. fs.existsSync 함수로 dirName 디렉터리 존재여부를 확인해 fs.mkdirSync 함수를 호출 해 디렉터리를 물리적으로 생성한다.
import fs from "fs";

export const makeDir = (dirName: string) => {
  if (false == fs.existsSync(dirName)) fs.mkdirSync(dirName);
};
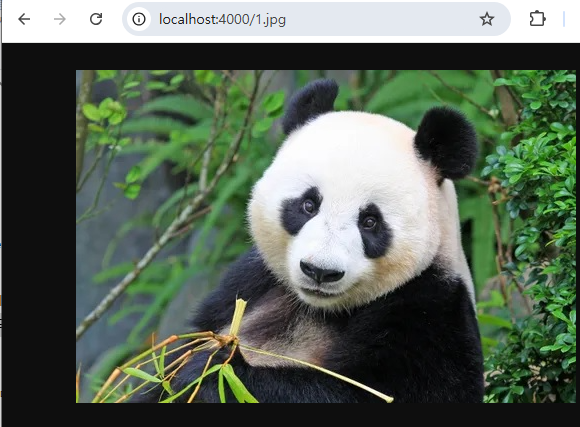
app index에 public 폴더를 생성하는 코드를 추가한 후 해당 폴더에 1.jpg를 넣고 localhost:4000/1.jpg로 접근 시 해당 파일에 접근할 수 있다.
import { createServer } from "http";

import { getPublicDirPath } from "./config";
import { makeDir } from "./utils";

import { createExpressApp } from "./express";

makeDir(getPublicDirPath());   // 폴더추가

const hostname = "localhost",
  port = 4000;

createServer(createExpressApp()).listen(port, () =>
  console.log(`connect http://${hostname}:${port}`)
);
express.json 미들웨어와 cors(Cross-Origin Resource Sharing) 미들웨어
웹 브라우저에서 HTTP POST 메서드를 통해 body부분의 데이터를 서버로 전송할 수 있다. 이렇게 전달받은 데이터를 req.body 형태로 얻을 수 있도록 express.json 미들웨어를 사용한다.
cors는 자바스크립트 코드에서 HTTP POST 메서드로 데잍러르 보낼 때 프리플라이트(preflight) 요청과 응답 통신 기능을 추가해 악의적인 목적의 데이터를 POST나 PUT 메서드로 서버쪽에 보내지 못하게 하는 기술이다.
fetch(url, {
    method: 'POST',
    headers: {'Content-Type' : 'application/json'},
    body: JSON.stringify(data)   // express.json 미들웨어를 통해 req.body 형태로 얻을 수 있다.
    mode: 'cars', cache: 'no-cache', credentials: 'same-origin' // cors 미들웨어를 통해 설정가능
})

app.use(express.json()).use(cors())  // 이런식으로 use를 통해 미들웨어 추가
익스프레스 라우터
express 패키지는 다음처럼 Router라는 함수를 제공하며 Router함수를 호출해 얻은 객체를 라우터라고 한다. 라우터 객체는 listen 메서드만 없을 뿐, app 객체와 동일하게 동작한다. 사용법은 app 객체의 use 메서드를 통해 사용한다.
아래 코드는 조회, 등록, 수정, 삭제에 대한 router를 구현한 초기 모습이다. 특별한 하위 경로 없이 구현 되었으며 이 코드는 REST API를 구현하는 기본 골격이 되는 구조를 가지고 있다.
import { Router } from "express";

export const testRouter = (...args: any[]) => {
  const router = Router();
  return router
    .get("/", (req, res) => {
      res.json({ ok: true });
    }) // 모든 데이터를 요청
    .get("/:id", (req, res) => {
      const { id } = req.params;
      res.json({ ok: true, id });
    }) // 특정 ID의 데이터를 요청
    .post("/", (req, res) => {
      const { body } = req;
      res.json({ ok: true, body });
    }) // 신규 데이터 등록
    .put("/:id", (req, res) => {
      const { id } = req.params;
      const { body } = req;
      res.json({ ok: true, body, id });
    }) // 특정 ID의 데이터 수정
    .delete("/:id", (req, res) => {
      const { id } = req.params;
      res.json({ ok: true, id });
    }); // 특정 ID 데이터 삭제
};
express 파일에 testRouter 반영하기
testRouter가 동작하기 위해서는 express 에 구현된 create ExpressApp함수에 app.use('/test', testRouter)와 같은 코드를 추가해야 한다. 다만 추가될 라우터가 많을 수 있으므로 라우터 설정 부분을 setupRouters라는 곳에 분리해 설정한다.
import { Express } from "express";
import * as R from "../routers";

export const setupRouters = (app: Express, ...args: any[]): Express => {
  return app.use("/test", R.testRouter(...args));
};
분리된 setupRouters를 기존 express 코드에 추가한다.
import express from "express";
import cors from "cors";
import { setupRouters } from "./setupRouters";

export const createExpressApp = (...args: any[]) => {
  const app = express();
  app
    .use((req, res, next) => {
      console.log(`url=${req.url}, method=${req.method}`);
      next();
    })
    .use(express.static("public")) // public 디렉토리에 있는 파일 참조
    .use(express.json())           // json parse를 위함
    .use(cors())                   // 보안을 위함
    .get("/", (req, res) => {
      console.log(`url=${req.url}, method=${req.method}`);
      res.json({ message: "Hello express World!" });
    });
  return setupRouters(app, ...args);
};
몽고DB 연결하기
connectAndUseDB 함수를 사용하여 몽고 DB의 db 객체를 createExpressApp 함수 호출 때 매개변수로 넘겨 주도록 하자.
import { createServer } from "http";

import { getPublicDirPath } from "./config";
import { makeDir } from "./utils";

import { createExpressApp } from "./express";
import type { MongoDB } from "./mongodb";
import { connectAndUseDB } from "./mongodb";

makeDir(getPublicDirPath());

const connectCallback = (db: MongoDB) => {
  const hostname = "localhost",
    port = 4000;
  // 1) createExpressApp로 DB를 매개변수로 전달
  createServer(createExpressApp(db)).listen(port, () =>
    console.log(`connect http://${hostname}:${port}`)
  );
};

connectAndUseDB(connectCallback, "ch07");
몽고DB 기능 추가하기
앞절에서 추가된 MongoDB의 연결된 db 객체를 appIndex → expressIndex → setupRouters -> testRouter순으로 매개변수로 전달 하였고 이 객체를 testRouter를 통해 router별로 DB데이터를 가공할 수 있다.
주의할 점은 몽고DB API는 Promise 객체를 반환하므로 async/await 구문으로 변경해 줘야 한다. 왜냐하면 오류 발생 시 API서버가 비정상적인 종료가 되기 때문에 try/catch문으로 오류를 반드시 처리해 줘야 한다.
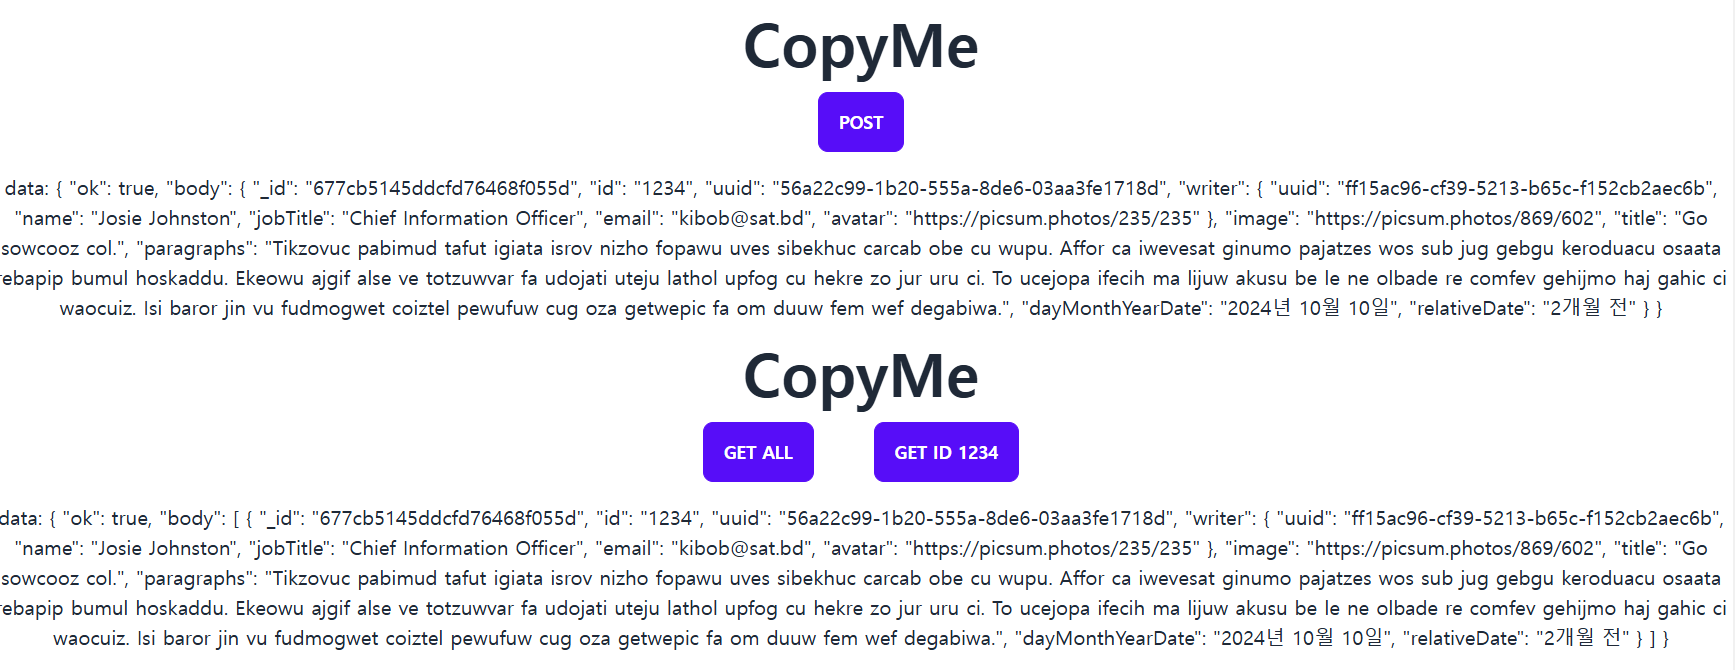
즉 await구문과 try/catch 구문이 함께 사용하는 코드 패턴은 중요하다. testRouter는 post메서드에서 생성된 문서의 _id 속성을 몰라도 REST 작업을 쉽게 하도록 id 속성에 '1234'를 설정했다.
import { Router } from "express";
import { MongoDB } from "../mongodb";

// 4) testRouter까지 전달된 db를 통해 몽고디비에 연결해 데이터를 가공할 수 있다.
export const testRouter = (...args: any[]) => {
  const db: MongoDB = args[0];
  const test = db.collection("test");
  const router = Router();
  return router
    .get("/", async (req, res) => {
      try {
        const findResult = await test.find({}).toArray();
        res.json({ ok: true, body: findResult });
      } catch (e) {
        if (e instanceof Error)
          res.json({ ok: false, errorMessage: e.message });
      }
    }) // 모든 데이터를 요청
    .get(":id", async (req, res) => {
      const { id } = req.params;
      try {
        const findResult = await test.findOne({ id });
        res.json({ ok: true, body: findResult });
      } catch (e) {
        if (e instanceof Error)
          res.json({ ok: false, errorMessage: e.message });
      }
    }) // 특정 ID의 데이터를 요청
    .post("/", async (req, res) => {
      const { body } = req;
      try {
        try {
          await test.drop(); // 항상 id: '1234'인 문서가 단 하나만 존재하도록 설정하기 위함
        } catch (error) {}
        const insertResult = await test.insertOne({ id: "1234", ...body });
        const { insertedId } = insertResult;
        const findResult = await test.findOne({ _id: insertedId });
        res.json({ ok: true, body: findResult });
      } catch (e) {
        if (e instanceof Error)
          res.json({ ok: false, errorMessage: e.message });
      }
    }) // 신규 데이터 등록
    .put(":id", async (req, res) => {
      const { id } = req.params;
      const { body } = req;
      try {
        const updateResult = await test.findOneAndUpdate(
          { id },
          { $set: body },
          { returnDocument: "after" }
        );
        res.json({ ok: true, body: updateResult });
      } catch (e) {
        if (e instanceof Error)
          res.json({ ok: false, errorMessage: e.message });
      }
    }) // 특정 ID의 데이터 수정
    .delete(":id", async (req, res) => {
      const { id } = req.params;
      try {
        await test.deleteOne({ id });
        res.json({ ok: true });
      } catch (e) {
        if (e instanceof Error)
          res.json({ ok: false, errorMessage: e.message });
      }
    }); // 특정 ID 데이터 삭제
};
클라이언트 만들기
testRouter에 구현된 get, post, put, delete 메서드들을 테스트할 수 있도록 리액트 클라이언트 앱을 구현하자. 기존까지 개발했던 트렐로 프로젝트를 클라이언트 프로젝트라고 명명하겠다.
클라이언트 프로젝트에 routes/RestTest 폴더에 index, GetTest, PostTest, PutTest, DeleteTest 파일을 추가 후 index에 코드를 추가한다.
import GetTest from './GetTest'
import PostTest from './PostTest'
import PutTest from './PutTest'
import DeleteTest from './DeleteTest'

export default function RestTest() {
  return (
    <div>
      <p className="text-3xl text-center text-bold">RestTest</p>
      <DeleteTest />
      <PutTest />
      <PostTest />
      <GetTest />
    </div>
  )
}
그후 RoutesSetup에 RestTest 컴포넌트에 대한 '/rest' 라우터 경로를 포함한 코드를 추가한다.
...(생략)...
import RestTest from './RestTest'
export default function routesSetup() {
  return (
    <Routes>
      <Route path="/" element={<Layout />}>
        <Route index element={<LandingPage />} />
        <Route path="/rest" element={<RestTest />} />
        <Route
          path="/board"
          element={
            <RequireAuth>
              <Board />
            </RequireAuth>
          }
        />
        ...(생략)...
  )
}
마지막으로 Navigationbar에 <Link to="/rest" className="btn btn-link">Rest Test</Link>를 추가한다.
fetch 함수로 JSON 형식 데이터 가져오기
현재 구현한 server는 REST 방식 API 서버로 동작하고 있어 클라이언트 서버에선 fetch함수를 사용해야 한다. fetch는 HTTP 프로토콜의 GET, POST, PUT, DELETE와 같은 메서드를 사용할 수 있다.
fetch API의 선언문이며 blob, json, text 같은 메서드가 있는 Respense 타입 객체를 Promise 방식으로 얻는다. 이 메서드의 첫 번째 매개변수 input의 타입 RequestInfo는 보통 http://localhost:4000/test 등 문자열을 사용한다.
function fetch(input: RequestInfo, init?: RequestInit): Promise<Response>
ineterface Response {
    bolb(): Promise<Blob>   // 이미지 등 Bolb타입 데이터를 텍스트나 바이너리 형태로 수신할 때 사용
    json(): Promise<Any>    // JSON 형식 데이터를 수신할 때 사용
    text(): Promise<string> // HTML 형식 데이터를 수신할 때 사용
}
fetch는 Promise 타입 객체를 반환하므로 Promise 객체의 then 메서드를 반드시 호출해야 하며 오류 발생 및 통신 장애가 일어날 수 있기에 catch메서드로 장애의 구체적인 내용을 텍스트 형태로 얻어야 한다.
우선 RestTest 디렉터리에 GetTest에 코드를 추가해 HTTP GET 메서드를 사용해 데이터를 얻어오자.
import {useState, useEffect} from 'react'

export default function GetTest() {
  const [data, setData] = useState<object>({})
  const [errorMessage, setErrorMessage] = useState<string | null>(null)

  useEffect(() => {
    fetch('http://localhost:4000/test')
      .then(res => res.json())
      .then(data => setData(data))
      .catch(error => setErrorMessage(error.message))
  }, [])

  return (
    <div>
      <p className="text-2xl text-center text-bold">Get Test</p>
      <div className="mt-4 text-center">
        <p>data: {JSON.stringify(data, null, 2)}</p>
        {errorMessage && <p>error: {errorMessage}</p>}
      </div>
    </div>
  )
}


서버 URL 함수 가져오는 함수 구현하기
컴포넌트 코드에 http://localhost:4000 등 API 서버 주소를 하드코딩 안하도록 getServerUrl이란 유틸리티 함수를 구현하자. 이렇게 유틸리티로 구성할 경우 하나의 주소만 수정을 하면 되기 때문에 유지보수하기 용이하다.
export const getServerUrl = (path: string) => {
  const host = 'http://localhost:4000'
  return [host, path].join('')
}
HTTP GET과 DELETE 메서드 호출용 함수 구현하기
getServerUrl을 이용해 GET과 DELETE 메서드 호출용 함수를 getAndDel.ts 파일에 추가한다.
import {getServerUrl} from './getServerUrl'

export const get = (path: string) => fetch(getServerUrl(path), {method: 'GET'}) // GET은 생략가능
export const del = (path: string) => fetch(getServerUrl(path), {method: 'DELETE'})
HTTP POST와 PUT 메서드 호출용 함수 구현하기
HTTP POST와 PUT 메서드는 method 설정값만 다를 뿐 사용법은 같다. 다만 POST와 PUT메서드는 cors문제가 있어 다음처럼 mode와 chche, credentials 속성값을 추가해야 한다.
fetch(getserverUrl(path), {
    method: 'POST' 혹은 'PUT',
    geaders: {'Content-Type' : 'application/json' },
    body: JSON.stringify(data),
    /** cors 속성 추가 start */
    mode: 'cors',
    cache: 'no-cache',
    credentials : 'same-origin'
    /** cors 속성 추가 end */
HTTP POST와 PUT 메서드 호출용 함수를 postAndPut.ts 파일에 추가한다.
import {getServerUrl} from './getServerUrl'

const postAndPut = (methodName: string) => (path: string, data: object) => {
  return fetch(getServerUrl(path), {
    method: methodName,
    headers: {'Content-Type': 'application/json'},
    body: JSON.stringify(data),
    mode: 'cors',
    cache: 'no-cache',
    credentials: 'same-origin'
  })
}
export const post = postAndPut('POST')
export const put = postAndPut('PUT')
몽고DB에서 가져오기
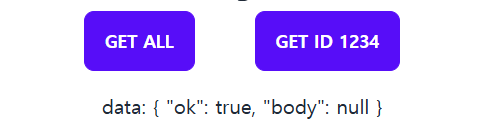
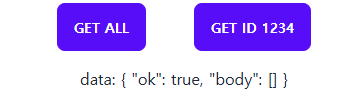
몽고DB에서 'test' 컬렉션 문서를 모두 가져오는 기능인 get('/test'), id값이 '1234'인 문서만 가져오는 get('/test/1234') 기능을 호출하도록 GetTest의 코드를 일부 수정한다.
getAllTest의 경우 test.find({}).toArray()를 호출하기 때문에 빈 배열인 []을 반환하며, 특정 id를 반환하는 getTest의 경우에는 '1234'를 갖고있는 키가 없기 때문에 null을 반환한다.
import {useState, useEffect, useCallback} from 'react'
import {get} from '../../server'

export default function GetTest() {
  const [data, setData] = useState<object>({})
  const [errorMessage, setErrorMessage] = useState<string | null>(null)

  const getAllTest = useCallback(() => {
    setErrorMessage(null)
    get('/test')
      .then(res => res.json())
      .then(data => setData(data))
      .catch(error => setErrorMessage(error.message))
  }, [])

  const getTest = useCallback(() => {
    setErrorMessage(null)
    get('/test/1234')
      .then(res => res.json())
      .then(data => setData(data))
      .catch(error => setErrorMessage(error.message))
  }, [])

  return (
    <div className="mb-4">
      <div className="flex justify-center mb-4">
        <button onClick={getAllTest} className="mr-12 btn btn-primary">
          GET ALL
        </button>
        <button onClick={getTest} className="btn btn-primary">
          GET id 1234
        </button>
      </div>
      <div className="mt-4 text-center">
        <p>data: {JSON.stringify(data, null, 2)}</p>
        {errorMessage && <p>error: {errorMessage}</p>}
      </div>
    </div>
  )
}

컬렉션에 데이터 저장하기
server쪽에 post 함수를 사용해 DB데이터를 추가하는 PostTest 컴포넌트를 추가하자.
import {useState, useCallback} from 'react'
import {post} from '../../server'
import * as D from '../../data'

export default function PostTest() {
  const [data, setData] = useState<object>({})
  const [errorMessage, setErrorMessage] = useState<string | null>(null)

  const postTest = useCallback(() => {
    post('/test', D.makeRandomCard())
      .then(res => res.json())
      .then(data => setData(data))
      .catch(error => setErrorMessage(error.message))
  }, [])
  return (
    <div className="mb-4">
      <div className="flex justify-center mb-4">
        <button className="btn btn-primary" onClick={postTest}>
          POST
        </button>
      </div>
      <div className="mt-4 text-center">
        <p>data: {JSON.stringify(data, null, 2)}</p>
        {errorMessage && <p>error: {errorMessage}</p>}
      </div>
    </div>
  )
}
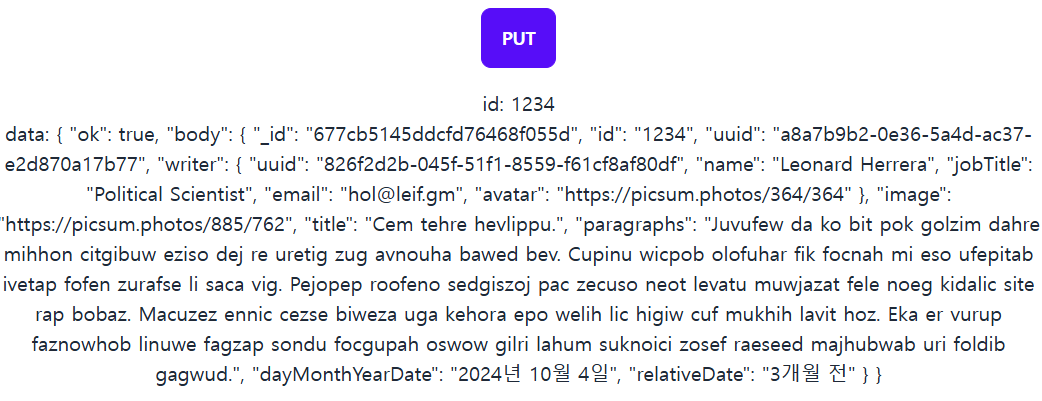
id 속성 값만 추출하기
서버에서 수신한 data의 타입을 ok라는 필수 속성과, body, errorMessage라는 선택 속성이 있는 타입으로 선언하고, Body타입은 다시 id라는 속성이 반드시 있는 Record 타입으로 선언한 PutTest.tsx 컴포넌트를 추가하자.
import {useState, useCallback} from 'react'
import {put} from '../../server'
import * as D from '../../data'

type Body = Record<'id' | string, any>
type Data = {
  ok: boolean
  body?: Body
  errorMessage?: string
}

export default function PutTest() {
  const [data, setData] = useState<Data | null>(null)
  const [errorMessage, setErrorMessage] = useState<string | null>(null)
  const putTest = useCallback(() => {
    put('/test/1234', D.makeRandomCard())
      .then(res => res.json())
      .then(data => setData(data))
      .catch(error => setErrorMessage(error.message))
  }, [])
  return (
    <div className="mb-4">
      <div className="flex justify-center mb-4">
        <button className="btn btn-primary" onClick={putTest}>
          PUT
        </button>
      </div>
      <div className="mt-4 text-center">
        <p>id: {data?.body?.id}</p>
        <p>data: {JSON.stringify(data, null, 2)}</p>
        {errorMessage && <p>error: {errorMessage}</p>}
      </div>
    </div>
  )
}
데이터 지우기
del함수를 사용해 몽고DB 'test' 컬렉션의 id '1234'인 문서를 지우는 기능을 구현하자.
import {useState, useCallback} from 'react'
import {del} from '../../server'

export default function DeelteTest() {
  const [data, setData] = useState<object>({})
  const [errorMessage, setErrorMessage] = useState<string | null>(null)
  const deleteTest = useCallback(() => {
    del('/test/1234')
      .then(res => res.json())
      .then(data => setData(data))
      .catch(error => setErrorMessage(error.message))
  }, [])
  return (
    <div className="mt-4 mb-4">
      <div className="flex justify-center">
        <button onClick={deleteTest} className="btn btn-primary">
          DELETE id 1234
        </button>
      </div>
      <div className="mt-4 text-center">
        <p>data: {JSON.stringify(data, null, 2)}</p>
        {errorMessage && <p>error: {errorMessage}</p>}
      </div>
    </div>
  )
}

'FrontEnd > React' 카테고리의 다른 글
| [React] JSON 웹 토큰으로 회원 인증 구현하기 (0) | 2025.01.07 |
|---|---|
| [React] 프로그래밍으로 몽고DB 사용하기 (1) | 2025.01.03 |
| [React] 공개 라우트와 비공개 라우트 구현하기 (3) | 2024.12.30 |
| [React] Outlet 컴포넌트와 중첩 라우팅 (1) | 2024.12.27 |
| [React] 처음 만나는 리액트 라우터 (1) | 2024.12.27 |


